
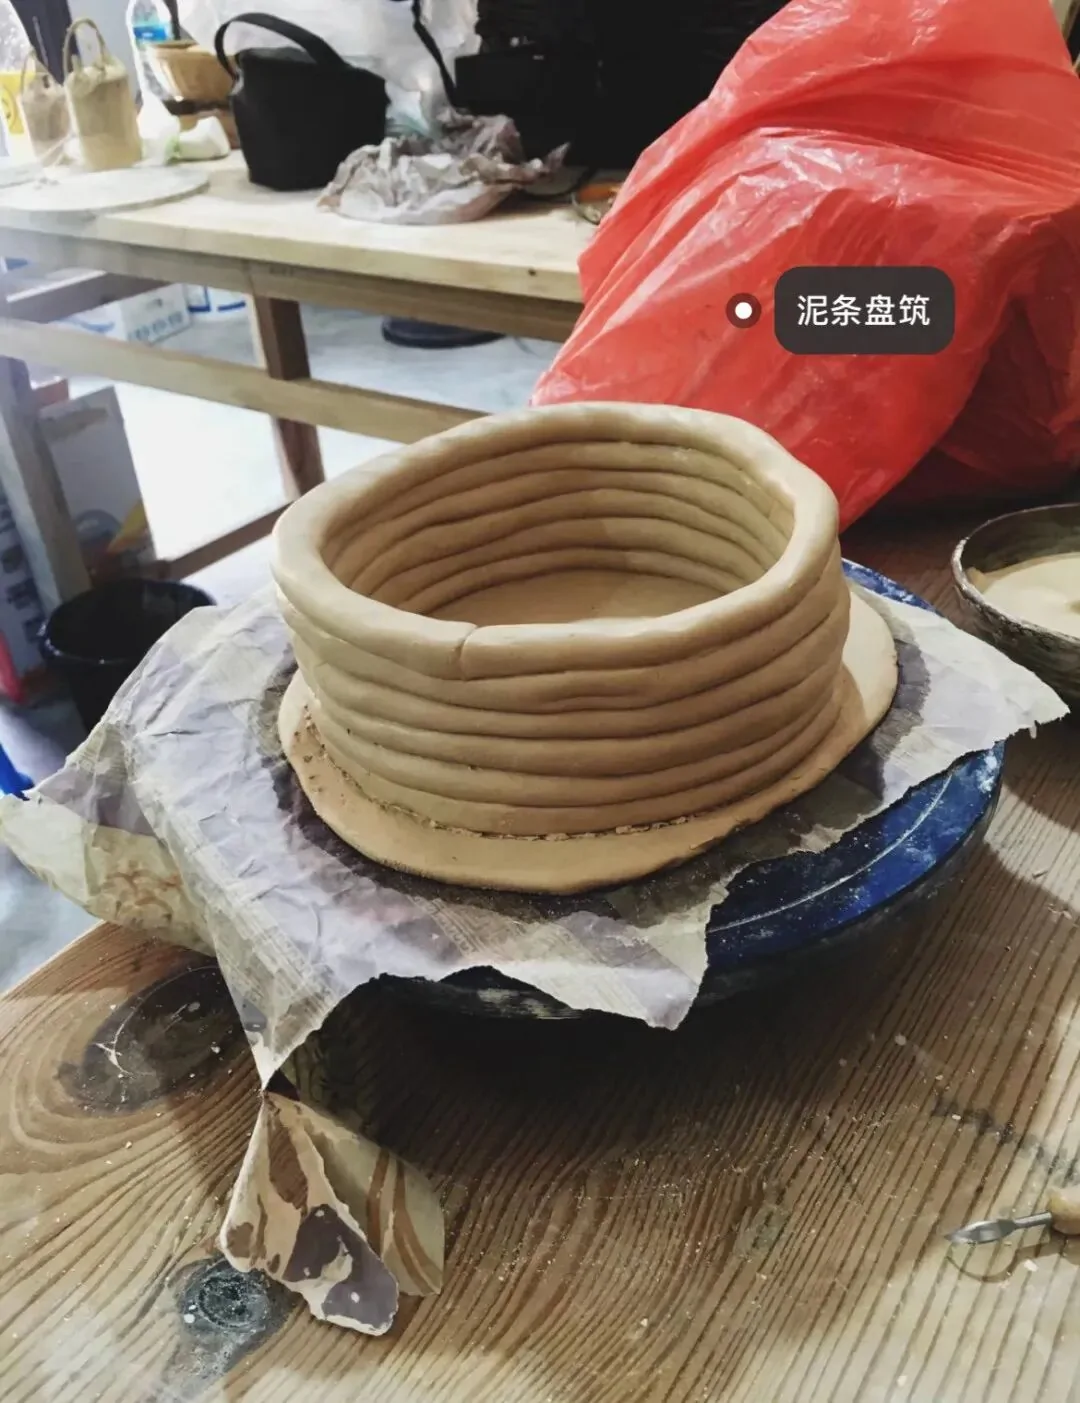
Five hand methods carry most studio work: pinching (捏雕, niēdiāo), slabbing (泥板法, níbǎnfǎ), coiling (围塑, wéishù, also 盘筑), throwing (拉塑, lāshù) and carving (雕刻, diāokè). Four of them build form; the fifth removes it. The practical question is not which is “best” but which one suits the form you have in mind, the tools you own and the time you have.
Comparison at a Glance
| Method | Direction | Tool Requirement | Best For | Characteristic Finish |
|---|---|---|---|---|
| Pinching 捏雕 | Additive, hand only | None | Small figures, ornaments, sculptural detail | Lively, slightly irregular, warm |
| Slabbing 泥板法 | Additive, flat sheet | Roller, guides, cutting rule | Rectangular vessels, tiles, relief panels | Crisp edges, geometric planes |
| Coiling 围塑 | Additive, layered | None (hands, slip, rib) | Tall vessels, hollow sculpture | Visible coil rhythm, weighty |
| Throwing 拉塑 | Additive, rotational | Wheel (essential) | Round domestic ware, symmetrical vessels | Smooth, precisely symmetrical |
| Carving 雕刻 | Subtractive | Loop, skew, V-gouge, needle | Surface pattern, relief, texture | Cut facets, shadow and line |
1. Pinching
Pinching uses only fingers, working a ball of clay with press, roll, squeeze and rotate. It is the oldest method and the easiest to start, but not the easiest to do well: control comes from feel, not from a jig. You can begin from a solid lump and refine detail — a face, a limb, a petal — or join small pressed sheets and coils together. Its natural home is small three-dimensional work: miniature animals, character figures, jewellery, or the delicate parts of a larger sculpture such as flowers and hands. The finish tends to stay lively and plain rather than polished.
Watch for: walls thick enough to survive drying but thin enough to fire evenly; solid masses must be hollowed or vented, or they will crack or explode in the kiln.
2. Slabbing
Clay is rolled to an even thickness and then cut, bent and joined. Uniform thickness is the whole discipline: uneven slabs shrink unevenly and pull themselves apart at the seams. Slabs can form straight-edged and folded forms, which is why the method suits square and rectangular vessels, boxes and trays, flat relief panels and geometric sculpture.
Watch for: joints must be scored, slipped and compressed; corners need internal fillets or reinforcing coils; slabs left to stiffen too long before joining will crack at the bend.
3. Coiling
Clay is rolled into even coils and then looped, stacked, joined and pressed upward into a hollow or solid form. This is additive building in the strict sense: the wall grows in stages. Coil diameter must stay consistent or the wall carries uneven load. Each layer’s joint is glued with slip and compressed to prevent firing cracks. Coiling suits tall vessels — vases, jars, brush pots — and hollow sculpture such as torsos and large figures. The coils can be left visible as a ribbed texture or ribbed smooth.
Watch for: letting a section dry before the next is added. The drier layer shrinks first and the joint opens. Cover work between sessions.
4. Throwing
On a wheel, a centred mass is opened and drawn upward between the hands: one hand steadies the centre, the other raises and thins the wall, adjusts height, opens or narrows the profile and forms the foot. Symmetry and even wall thickness depend on balance and repetition — this is the method with the longest learning curve. It suits round domestic ware (bowls, plates, cups, bottles, teapots) and formal vessels, and the resulting surface can later be carved, faceted or glazed.
Watch for: wall thickness at the base, which must carry the piece; over-thin rims that collapse in the glaze firing; and centring errors that show as soon as the wall rises.
5. Carving
Carving works on a formed body — pinched, thrown, coiled or slab-built — at leather-hard or dry stage, using loop tools, skews, gouges and needles to cut line, texture and relief. Incised work (yīnkè, 阴刻) sinks the pattern; raised work (yángkè, 阳刻) leaves it standing. Pressure must be even, or the body cracks along the cut.
Watch for: carving a thin wall until it becomes unsound; sharp internal corners that concentrate stress; and dry dust, which is both a firing defect risk and a health hazard. Work leather-hard where possible.
Choosing Between Them
| If your goal is… | Use | Because |
|---|---|---|
| A small figure or ornament with character | Pinching | Fast, no tooling, detail by hand |
| A flat panel, tile or box | Slabbing | Flatness and straight edges |
| A tall or hollow form beyond wheel capacity | Coiling | Height built incrementally, no wheel limit |
| Symmetrical domestic ware at volume | Throwing | Speed and repeatability |
| Surface pattern on an existing form | Carving | Works on any body, any method |
In practice the methods combine. A thrown bowl is often carved; a coiled jar may be paddled and incised; a pinched figure may sit on a slab base. The category that matters is not the technique but the sequence — what is built first, what is joined while still plastic, and what is cut only once the body can hold an edge.
Frequently Asked Questions
Which method is easiest for a complete beginner?
Pinching. It needs no equipment and teaches clay behaviour directly. Throwing has the steepest curve, because it depends on sustained centring and balance.
Can I combine coiling and throwing?
Yes. The usual approach is to throw the base and lower wall, then coil upward once the piece is too tall for the wheel. The joint must be compressed and kept damp until the next section is added.
Why do slab pieces crack at the corners?
Uneven shrinkage and stress concentration. Solutions: roll slabs to even thickness, join at consistent moisture, add an internal coil or fillet at the corner, and dry slowly under cover.
Should carving be done before or after glazing?
Before. Carving cuts the clay body; glaze fills the cuts and pools in them, which is what produces the shaded line. Glazing first makes carving impossible.
Related Reading
For the fuller production set, including press-moulding and slip casting, see Ceramic Forming Techniques: Six Methods from Coil to Slip Casting. For surface work in depth, read 25 Carving and Texturing Techniques for Ceramic Art, and for sculptural work specifically, Jingdezhen Porcelain Sculpture: Four Core Techniques.
Try these methods on our prepared bodies — see the shop, or email us for workshop enquiries.