
Jingdezhen blue and white porcelain is made in fifteen workshop steps: the clay is wedged, thrown, mould-pressed and trimmed; the interior is glazed before the cobalt painting; a second, dipped glaze follows; the foot is cut and marked; then a reduction firing at about 1,330u00b0C lasts some ten hours. From clay to kiln, the process spans several weeks.
From clay to kiln: the fifteen steps at a glance
The fifteen steps fall into four phases: preparing the clay (Steps 1u20134), glazing and painting (Steps 5u20138), feet and marks (Steps 9u201311), and firing and finishing (Steps 12u201315). Every piece of Jingdezhen porcelain u2014 whether a small tea cup or a large vase u2014 passes through the same sequence, and the photographs in this article record it stage by stage in a working workshop.
This walkthrough concentrates on the order of operations and the detail of each workshop step. The glazing methods, the cobalt pigments and the wider family of decorative techniques are explained in our companion article on the five core techniques of blue and white porcelain.
Preparing the clay (Steps 1u20134)
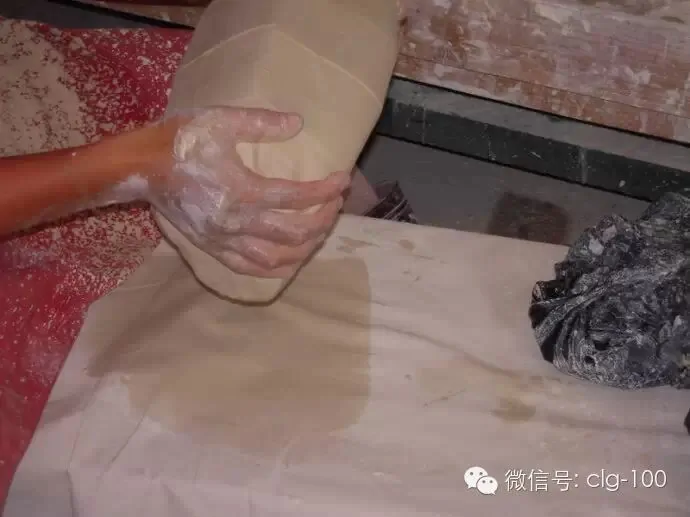
Step 1: Wedging the clay
Wedging is the most basic operation of all. The clay is kneaded and folded again and again so that trapped air is driven out and the material becomes dense and compact. Skip this step and air bubbles stay in the body: as the piece dries and is fired, those bubbles turn into cracks and distortion.
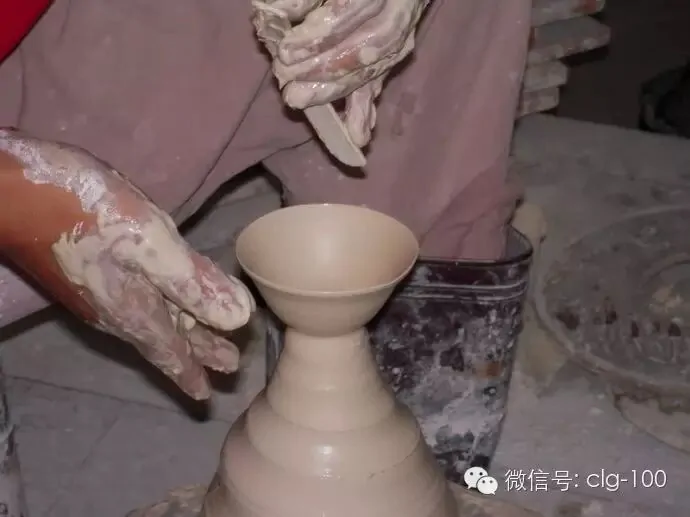
Step 2: Throwing the rough body
In the traditional Jingdezhen method for round wares u2014 plates, bowls and cups u2014 the thrower forms a rough body that already approximates the final shape. The blank is deliberately crude: it exists as the base for the mould-pressing that follows. The material is a blended paste of porcelain stone and kaolin, and the way that porcelain body is prepared from its raw materials is covered in a companion guide.
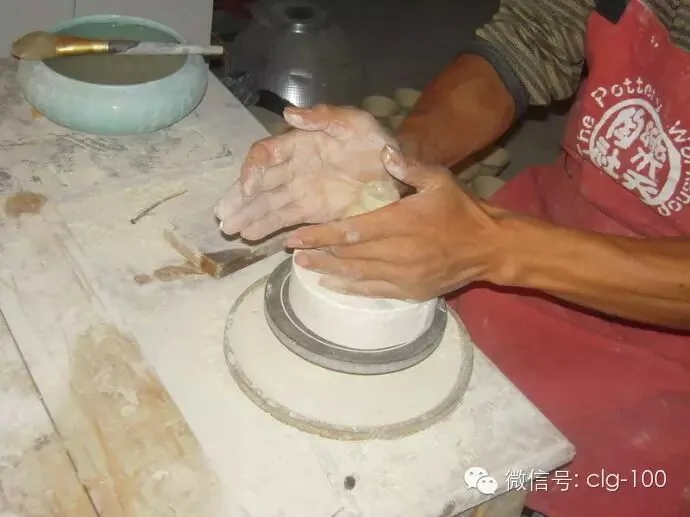
Step 3: Mould-pressing the form
The rough bodies first dry naturally in the shade u2014 laid slanted on the boards, never stood upright, because a body dried upright can crack at its base. When the blank is leather-hard it is pressed by hand against an earthen mould and tapped until it sits true: regular, round and well-knit. Mould-pressing is what allows hand-formed round wares to come out of the kiln uniform.
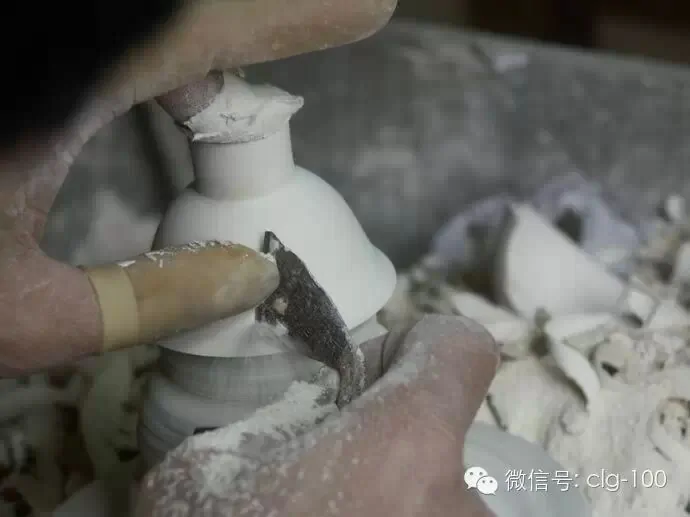
Step 4: Trimming the body
The pressed blank is fine-turned on the wheel: trimmed and refined until the surface is smooth, rounded and even, and ready to take glaze.
Glazing and painting (Steps 5u20138)
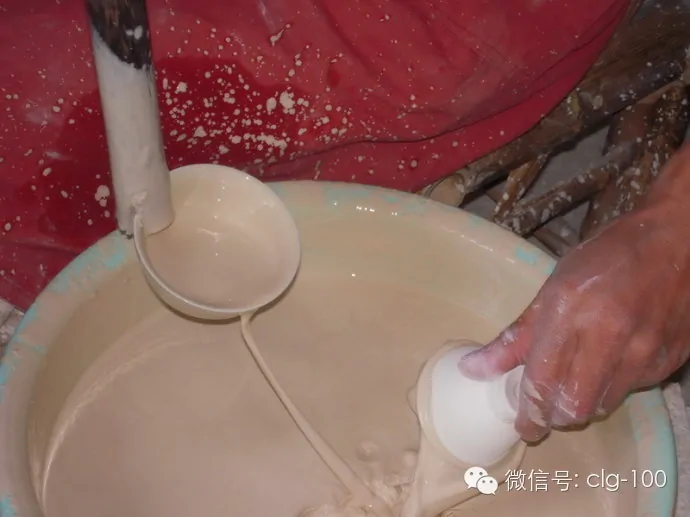
Step 5: Swilling the interior glaze
If the inside of the vessel will carry no painted decoration, the interior is glazed first. Glaze itself is a thin, glassy layer bonded to the body u2014 chemically close to glass u2014 made from quartz, feldspar and clay. Potters can apply it by spraying, blowing, dipping, pouring or swilling; here the interior and the base are coated by the traditional swilling method, while the outside is glazed later by dipping.
Step 6: Painting the design
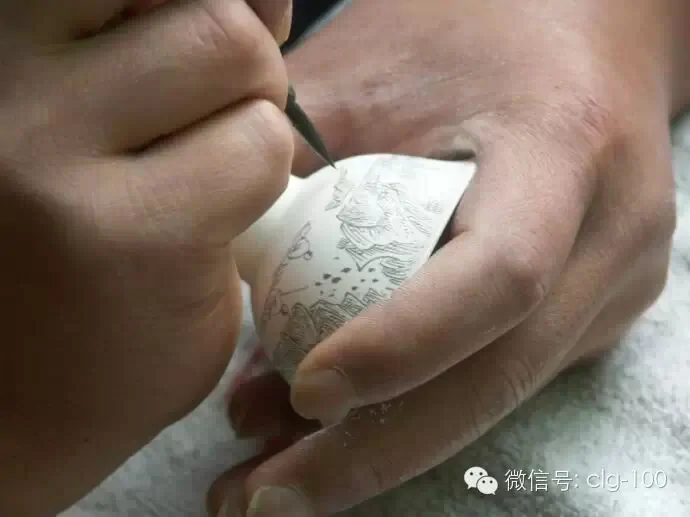
With the interior glazed, the painter takes over. The cobalt pigment has already been ground for a long time to a very fine paste u2014 and its composition is a secret that each workshop keeps and never passes on.
Step 7: Colour washing for tonal depth
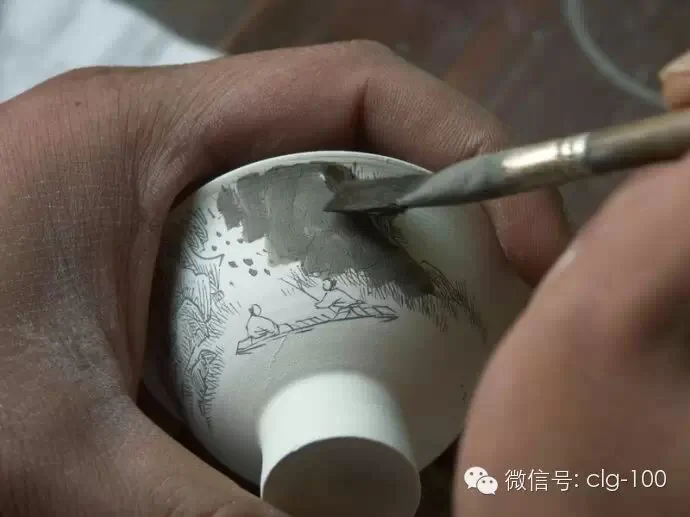
Blue and white holds a place in Chinese ceramics much as freehand ink-wash landscape painting holds in Chinese art. Its beauty lies not only in fine brushwork: the finest pieces carry the soft, layered gradations of a landscape’s texture strokes and washes. All of that comes from hun shui, the colour-washing step, in which diluted cobalt is laid in tone upon tone to build depth.
Step 8: Dipping the outer glaze
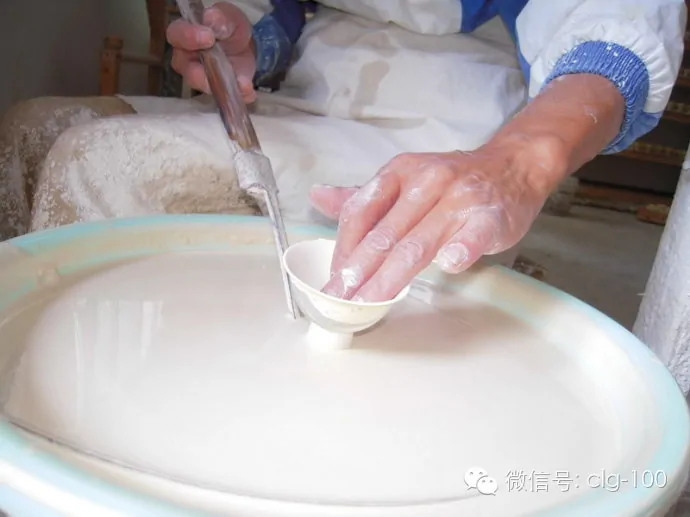
The painted body now goes through its second glazing. At this point the foot has not yet been formed. Dipping asks a great deal of the potter, who must judge the body, the glaze slurry and the intended result together u2014 because the time the piece spends in the glaze directly determines its appearance after firing.
Feet, marks and the glazed foot (Steps 9u201311)
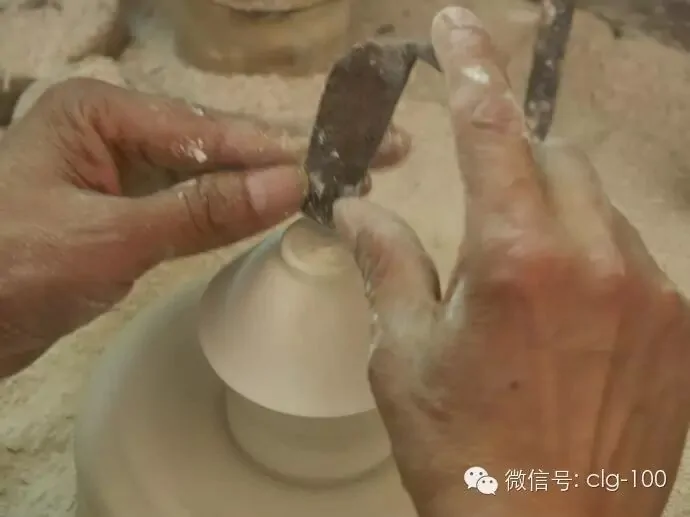
Step 9: Cutting the foot ring
Once the outer glaze has dried naturally, the base is carved. Because this is a glazed-foot piece, the cutter leaves the outermost ring of the foot as bare body u2014 and keeps that ring even and consistent all the way round. It takes strong control and real foundation skill.
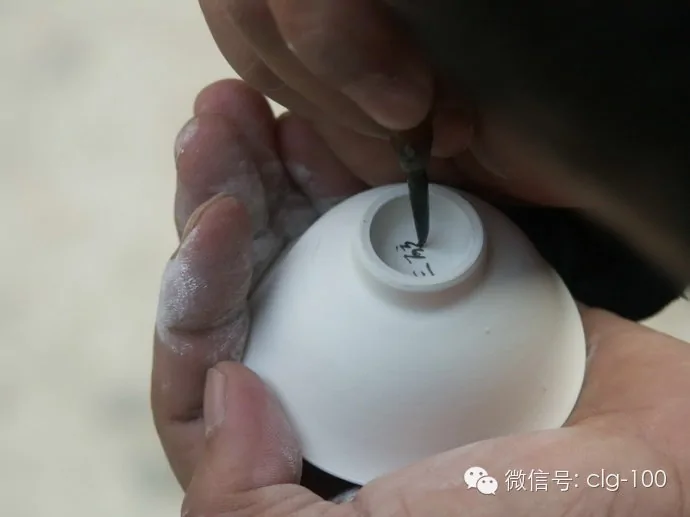
Step 10: Writing the mark and glazing the base
The base is then inscribed u2014 typically with the maker’s name or the year of making u2014 and receives its glaze, swilled on just as the interior was.
Step 11: Fitting the glazed foot
The glazed foot starts life as a small disc of clay, formed by hand on the wheel. Once dry, it is turned back on the wheel to its final profile and matched one-to-one with its cup, mating with the ring of bare body left at Step 9.
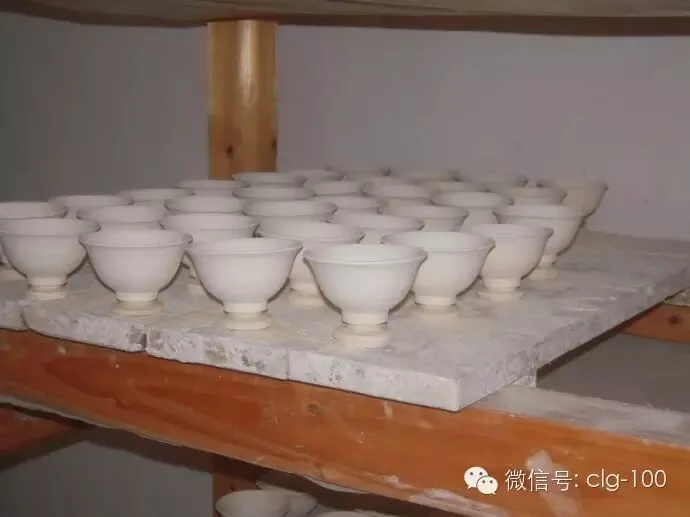
Why the glazed foot matters
Support-firing on a glazed foot (youzu) first appears in the imperial kilns that made porcelain for the court. A vessel fired this way has a fully glazed foot: handsome, smooth to the touch, and kind to the surface of the furniture it stands on. Because the work is complex and demanding, the modern industry reserves it for precious, high-end pieces u2014 so a fully glazed foot remains a quiet marker of top-grade handwork.
Filling and firing the kiln (Steps 12u201313)
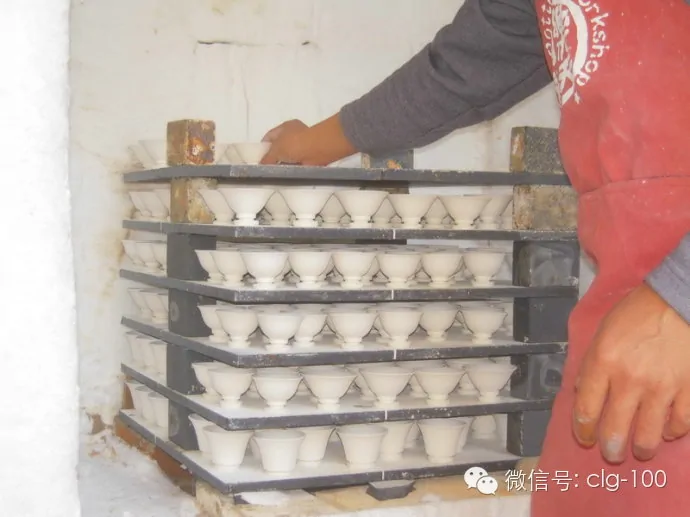
Step 12: Packing the kiln
Distributing the wares through the kiln is a discipline of its own. Placement is planned around the kiln’s structure and size and the sizes of the pieces being fired, with fire channels and flues left clear. Poor packing disturbs the atmosphere inside the chamber during firing u2014 and a disturbed atmosphere means a failed firing.
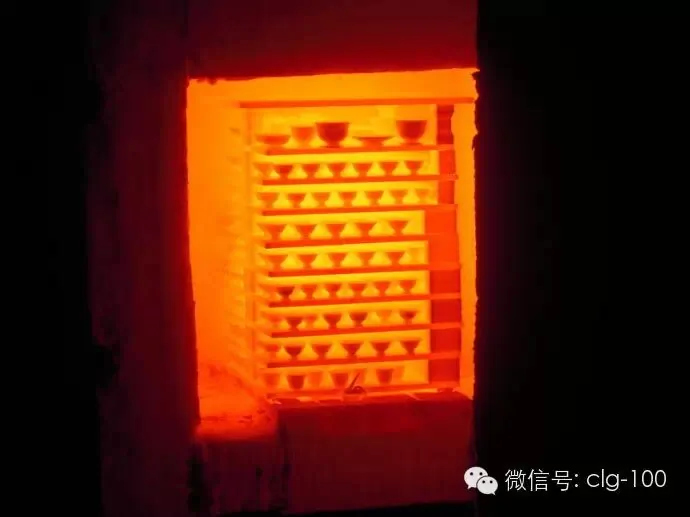
Step 13: Reduction firing at 1,330u00b0C
Jingdezhen‘s traditional blue and white is reduction-fired: the chamber is kept short of oxygen so the cobalt develops its full blue. The peak temperature reaches about 1,330u00b0C, sustained over roughly ten hours of firing.
What happens when the kiln opens (Steps 14u201315)
After firing, the kiln is left alone: twelve to eighteen hours of natural cooling until the chamber is back at room temperature. Only then is it opened u2014 the most suspenseful moment of the entire process.
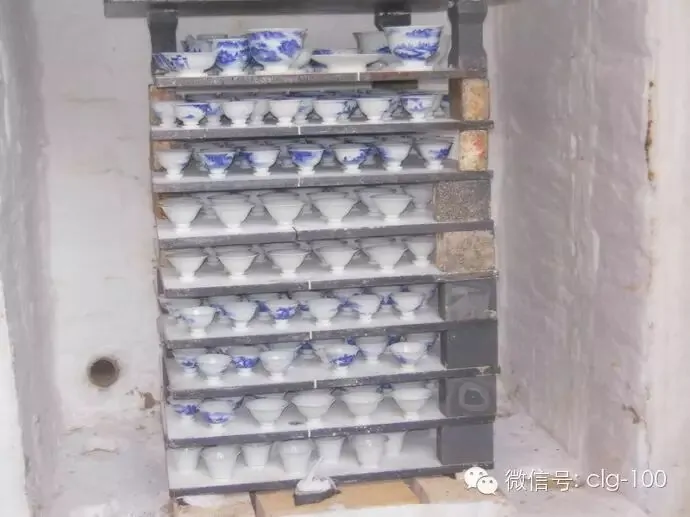
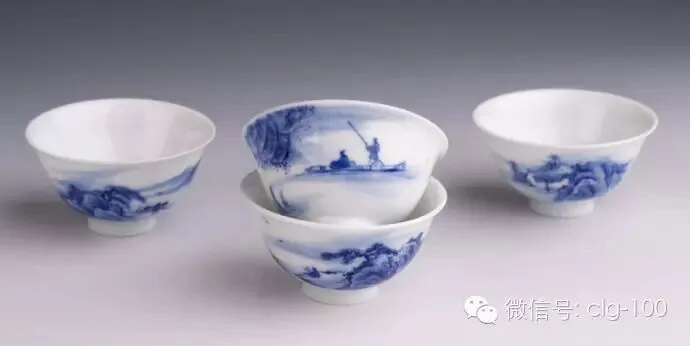
Even now the work is not over. Every piece that comes out of the kiln is inspected, and each foot is ground and polished. Only after all that firing and grinding does the finished blue and white piece finally emerge u2014 tableware and collectables in daily use for centuries.
Explore Jingdezhen craftsmanship
The sequence in this article is not a museum memory: it runs daily in Jingdezhen’s workshops. Our studios follow the same fifteen steps to make hand-painted porcelain u2014 plates, bowls, cups and teapots painted in cobalt underglaze by trained artisans. Enquire for current pieces or custom commissions.
Contact Jingdezhen Heritage
For enquiries about our porcelain, custom commissions or wholesale, please Email Jingdezhen Heritage u00b7 Message us on WhatsApp.
Images: workshop photographs via the original Chinese-language article (Cang Le Ge Art Museum, Shenzhen u2014 WeChat clg-100).